by: Radhika Jain
Introduction
Unlock hidden value in enterprise documents with Snowflake Openflow and Cortex. In this use case, you’ll see how to automate ingestion and indexing of Google Drive content—enabling permission-aware, AI-powered search and intelligent applications like chatbots and dashboards. Say goodbye to manual ETL and hello to real-time insight.
Use Case Overview
In today’s data-driven world, critical business knowledge often lives in unstructured formats on platforms such as Google Drive. Turning those documents into searchable, AI-ready assets is a major challenge—until now.
With Snowflake Openflow’s Google Drive Connector, you can automatically ingest, process, and index your Drive content in Snowflake, all while preserving native access controls. This blog explores how to:
- Automate ingestion and chunking of unstructured files
- Store and manage document fragments in Snowflake
- Build a Cortex Search service for real-time, permission-aware querying
Why Openflow for Unstructured Data
Organizations across industries face common data onboarding hurdles:
- Data integration complexity
- Fragmented pipelines
- Lack of real-time data flow
Snowflake Openflow — Snowflake’s open, API-driven data workflow engine built on Apache NiFi — directly addresses these challenges by integrating Google Drive content with Snowflake Cortex using Openflow, businesses gain:
Faster Time to Insights: Automated pipelines make new data available in Snowflake within minutes, accelerating the data-to-value cycle.
Lower Operational Overhead: Teams manage a single platform instead of juggling multiple ETL tools or custom scripts, reducing pipeline failures and troubleshooting time.
Greater Agility and Scalability: Openflow’s configurable and scalable architecture supports rapid onboarding of new sources and handles both batch and streaming data.
Improved Data Quality and Governance: Each step in the pipeline is fully traceable, providing end-to-end visibility and data lineage for compliance and troubleshooting.
AI-Readiness: Unstructured content like documents and images is prepared inline for AI/ML models, enabling real-time enrichment or analysis within the data flow.
Adherence to Access Controls: AI assistants respect Google Drive’s native sharing permissions, ensuring data security and privacy are preserved.
Technical Deep Dive: Setting Up Automated Google Drive Search
This solution involves several key phases — starting with foundational configurations in Google Cloud and Snowflake, and culminating in the deployment and operation of the Openflow Google Drive Connector.
Phase 1: Prerequisites & Initial Setup
To begin, ensure your Google Cloud and Snowflake environments are properly configured.
Google Cloud Setup
Set up the necessary credentials and permissions to allow Snowflake to access Google Drive data securely:
- Enable the Google Drive API and Google Cloud Storage (GCS) APIs.
- Create a Google Cloud service account and grant it appropriate access to the target Drive folders.
- Generate and download the service account JSON key.
- Share the relevant Google Drive folders with this service account’s email ID.
Google Cloud Setup Guide
1. Create a Google Cloud Project:
Begin by creating a new project in the Google Cloud Console. This project acts as the foundation for managing APIs, billing, and permissions across all Google Cloud services.
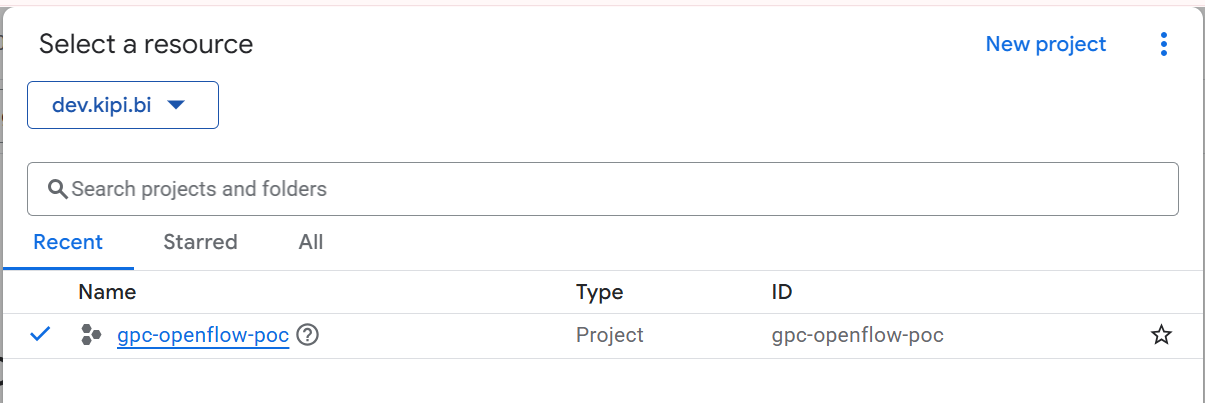
Google Cloud Console Dashboard displaying the newly created project for enabling Drive API access.
2. Enable the Required APIs:
Within your Google Cloud project, navigate to the API Library and enable the following APIs:
- Google Cloud Search API
- Google Drive API
These are essential for accessing and indexing content from Google Drive.
3. Create a Service Account and Generate a Key:
To allow Openflow to authenticate and interact with Google APIs securely, follow these steps:
- Navigate to IAM & Admin > Service Accounts in the Google Cloud Console.
- Click Create Service Account, enter a name, and click Create and Continue.
- Click Done to finish the setup.
- In the list of service accounts, locate your newly created account and copy its OAuth 2 Client ID — this is critical if you plan to enable domain-wide delegation.
- Click the account’s Actions menu, then select Manage keys > Add key > Create new key.
- Choose the JSON key type (default), then click Create.
- A private key file will be downloaded. Store this JSON key securely, as it is required by Openflow for authentication.
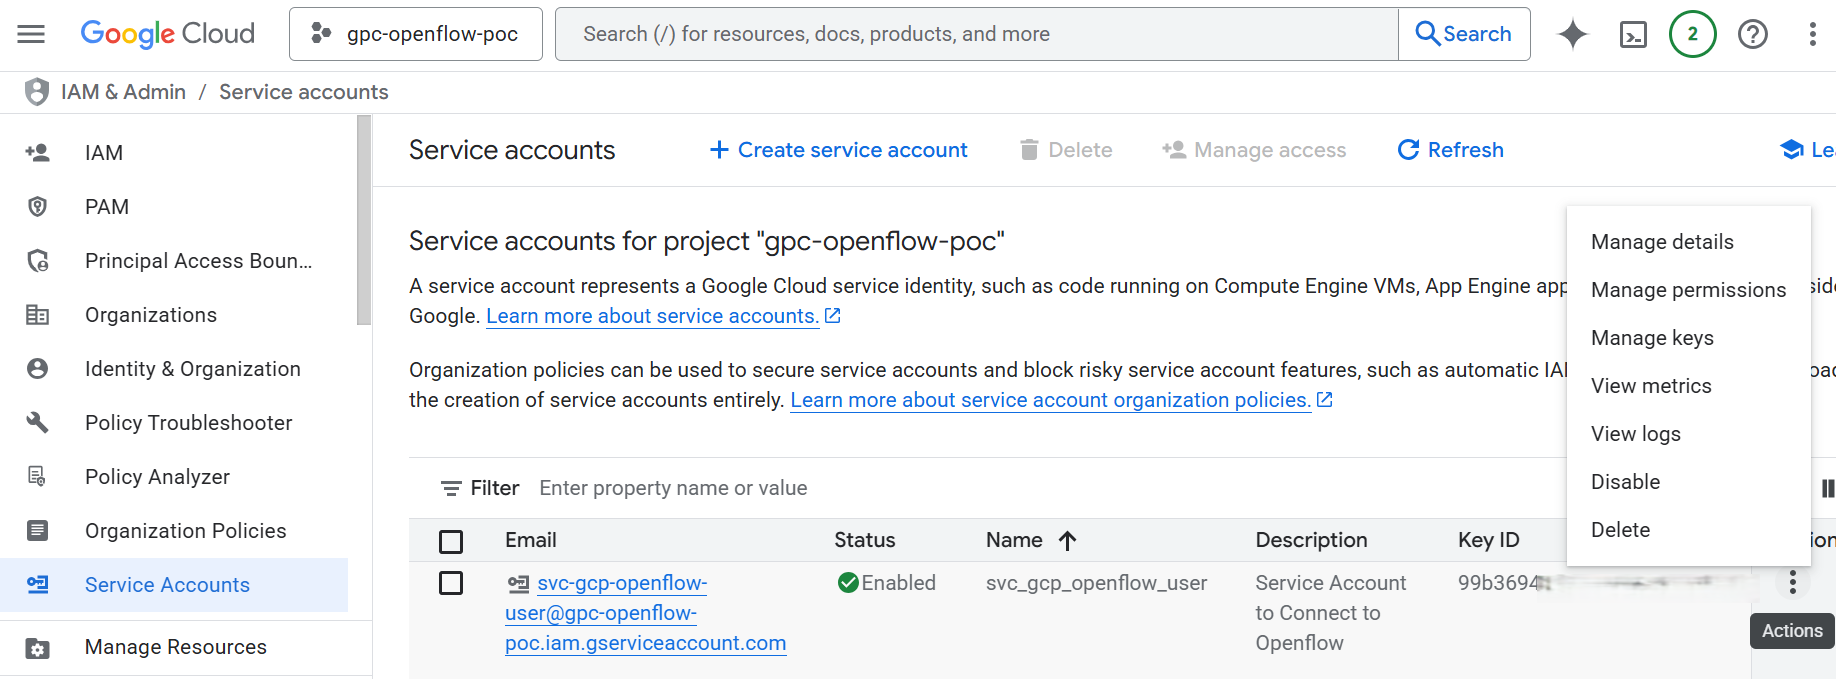
Service Accounts page in Google Cloud Console displaying the newly created service account, along with the “Manage keys” dialog used to generate a JSON key for authentication.
4. Grant Domain-Wide Delegation to the Service Account:
This step allows your service account to impersonate users and access Google Workspace data (like Google Drive files) on their behalf.
Steps:
- Log in to your Google Admin Console with administrator credentials.
- Navigate to: Admin > Security > Access and data control > API Controls > Manage Domain-Wide Delegation
- Click Add new to register your service account.
- Paste the OAuth 2 Client ID you copied earlier from the service account page – Add the following OAuth scopes (use commas to separate scopes if prompted):
https://www.googleapis.com/auth/drive
https://www.googleapis.com/auth/drive.metadata.readonly
https://www.googleapis.com/auth/admin.directory.group.member.readonly
https://www.googleapis.com/auth/admin.directory.group.readonly
https://www.googleapis.com/auth/drive.file
https://www.googleapis.com/auth/drive.metadata
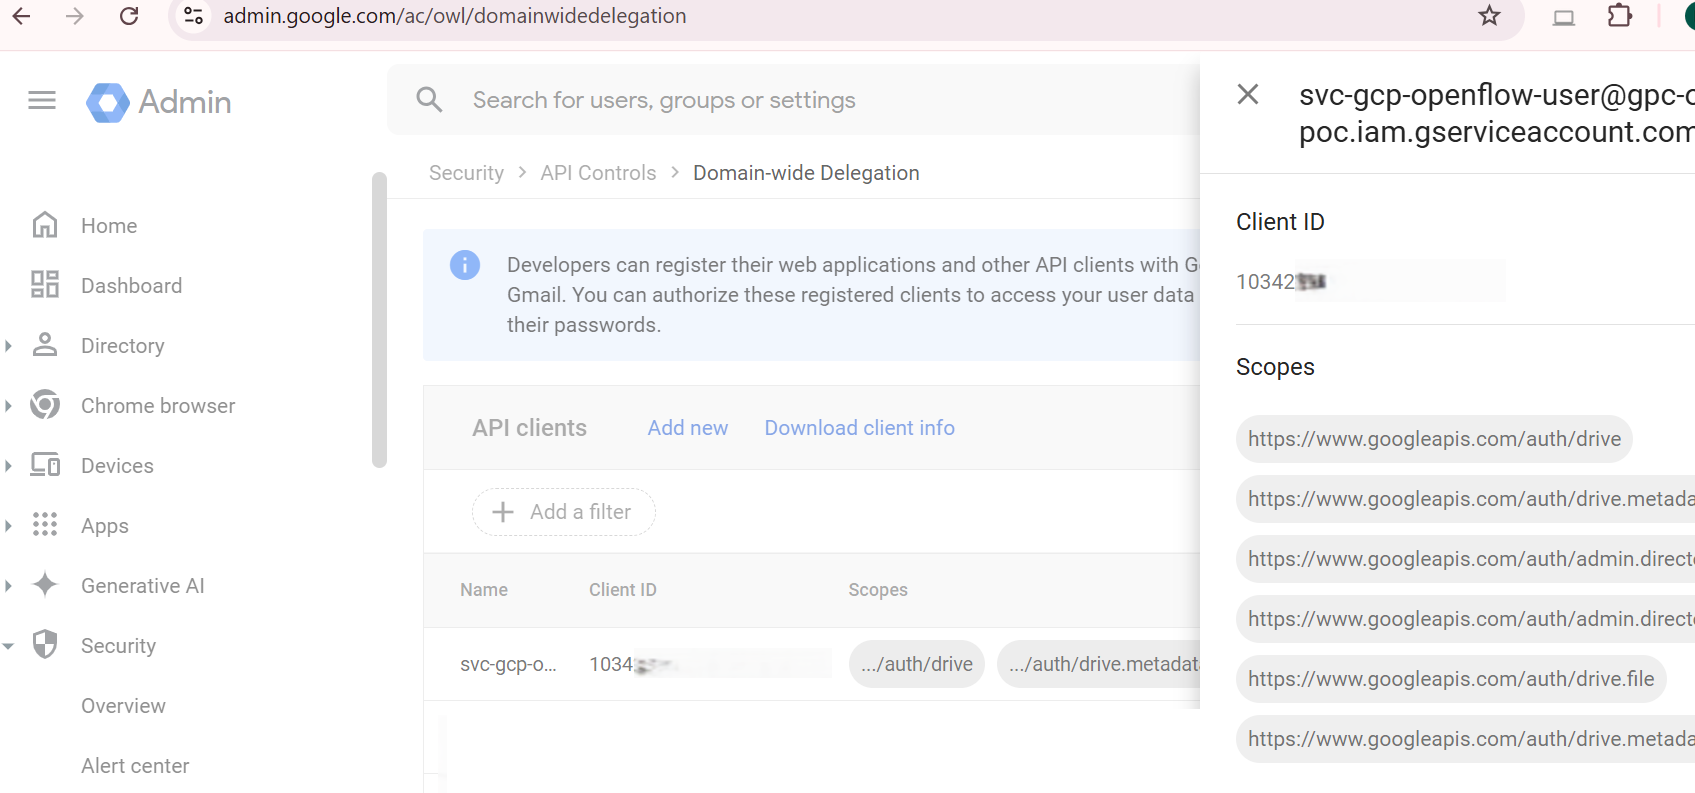
Google Admin Console showing the “Manage domain wide delegation” screen, with the OAuth 2 Client ID and required API scopes entered to authorize the service account.
Shared Google Drive Setup
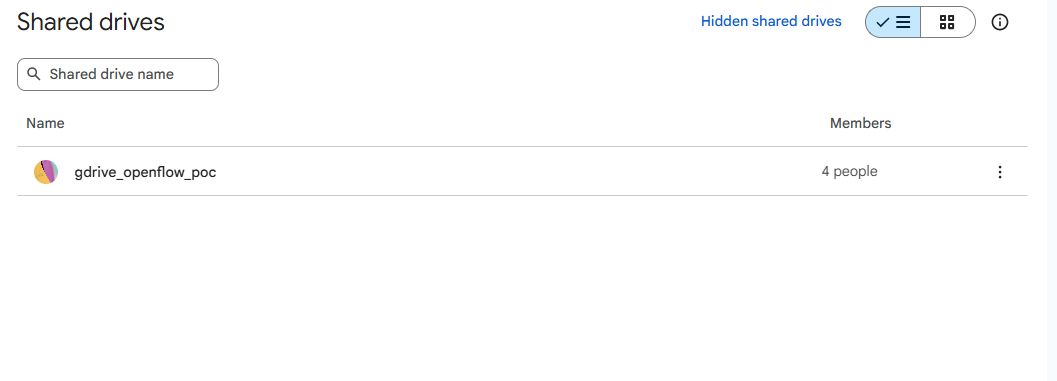
1. Create a Shared Drive: Navigate to your Google Drive interface.
On the left-hand menu, click “Shared drives” → then click “New” to create a new shared drive.
Give it a name (e.g., Openflow Data Repository) and click Create.
This shared drive will act as the source location for documents to be ingested by Openflow into Snowflake.
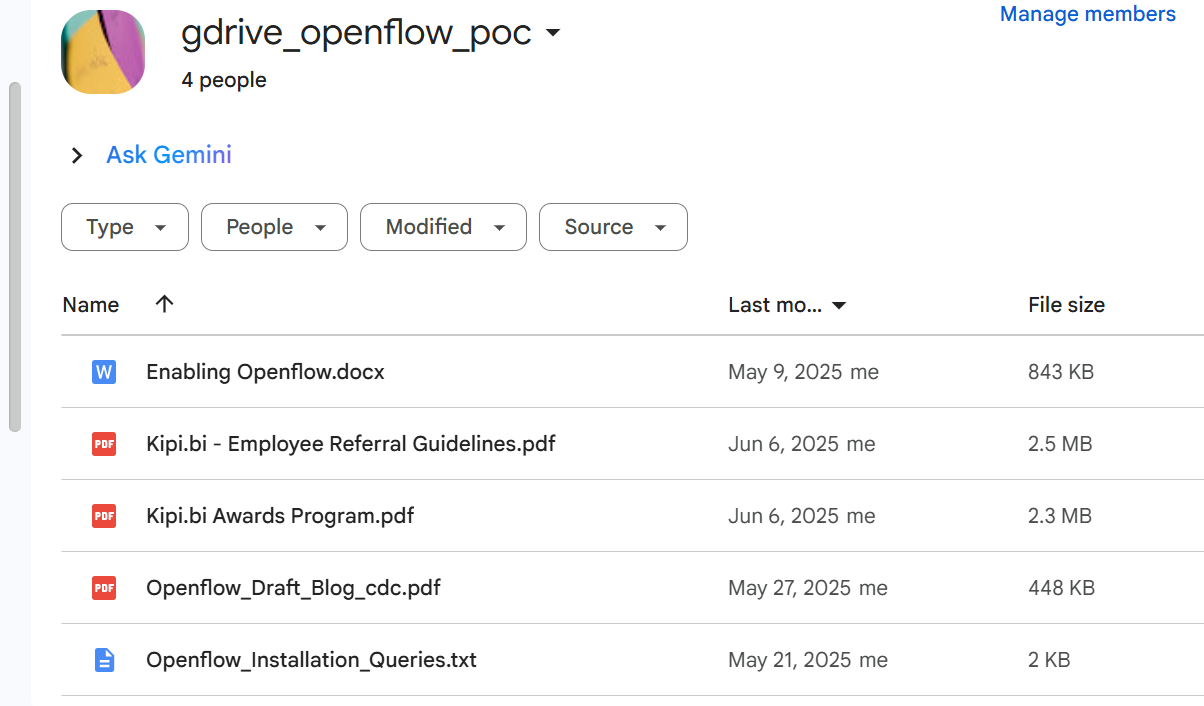
2. Files to the Shared Drive:
Upload or move relevant documents (PDFs, DOCX, TXT, etc.) into the newly created Shared Drive.These files will be accessed by Openflow for ingestion into Snowflake, so ensure the content is appropriate for indexing and follows your organization’s data governance policies.
Snowflake Account Setup
To enable secure and organized data access, you’ll need to create a dedicated user, role, and warehouse for the Openflow connector.
1. Create a Snowflake User and Role
- Service User: Create a dedicated service user (e.g., OPENFLOW_SERVICE_USER) that the connector will use to authenticate.
- Connector Admin Role: Define a role (e.g., OPENFLOW_CONNECTOR_ADMIN_ROLE) that has the required privileges for accessing the target database, schema, and executing ingestion processes.
- Grant Role to User: Assign the OPENFLOW_CONNECTOR_ADMIN_ROLE to the OPENFLOW_SERVICE_USER.
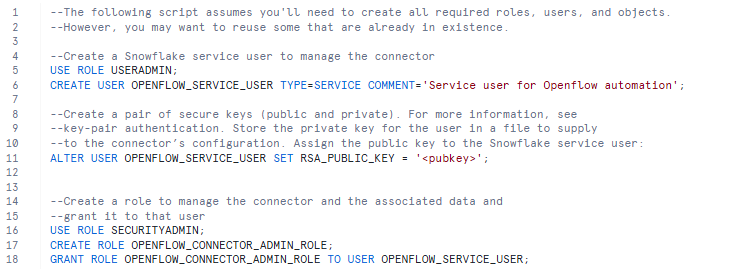
2. Configure Key-Pair Authentication: Snowflake strongly recommends key-pair authentication.
- Generate a public/private key pair and assign the public key to your Snowflake service user.
- It is highly recommended to use a secrets manager (e.g., AWS, Azure, Hashicorp) to store your private key. In Openflow, configure a Parameter Provider associated with your Secrets Manager to fetch parameter values securely.
3. Designate a Warehouse:
- Choose a warehouse for the connector (e.g., COMPUTE_WH). Start with a smaller size and adjust as needed.
- Grant USAGE and OPERATE privileges on this warehouse to your openflow_connector_admin_role.
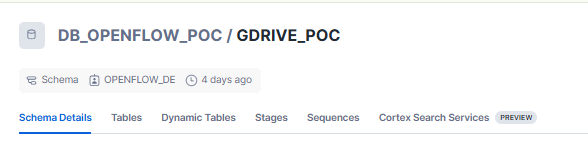
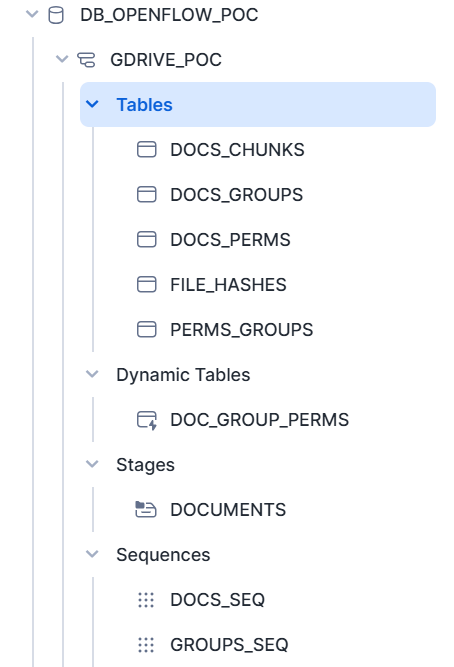
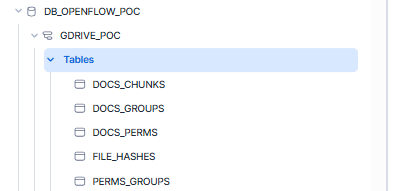
4. Create Database and Schema:
- Create a database (e.g., DB_OPENFLOW_POC) and schema (e.g., GDRIVE_POC) where the ingested data will be stored.
- Grant appropriate permissions to the openflow_connector_admin_role, including CREATE TABLE, CREATE DYNAMIC TABLE, CREATE STAGE, CREATE SEQUENCE, and CREATE CORTEX SEARCH SERVICE.
Phase 2: Installing & Configuring the Openflow Connector
- This step sets up all necessary controller services and parameters required for the connector to function properly.
Once your Google Cloud and Snowflake environments are prepared, the next step is to install and configure the Openflow Connector for Google Drive Cortex Connect.
- Install the Connector:
- Access the Openflow Interface: Navigate to the Openflow Overview page in Snowflake.
- Browse Connectors: In the Featured connectors section, select View more connectors.
- Add Google Drive Connector with Cortex Search: Find the “Openflow Connector for Google Drive Cortex Connect ” and select Add to runtime.
- Select Runtime: Choose your runtime from the drop-down list and click Add.
- Authenticate: Authenticate with your Snowflake account credentials when prompted.
- Connector Canvas Deployment: The Openflow canvas will appear with the connector’s process group added.
- Configure the Connector Parameters:
Once the connector is added to the Openflow canvas, follow these steps to configure it:
Right-click on the imported process group on the Openflow canvas and select Parameters.

Enter the required values for all the parameters in the context window:
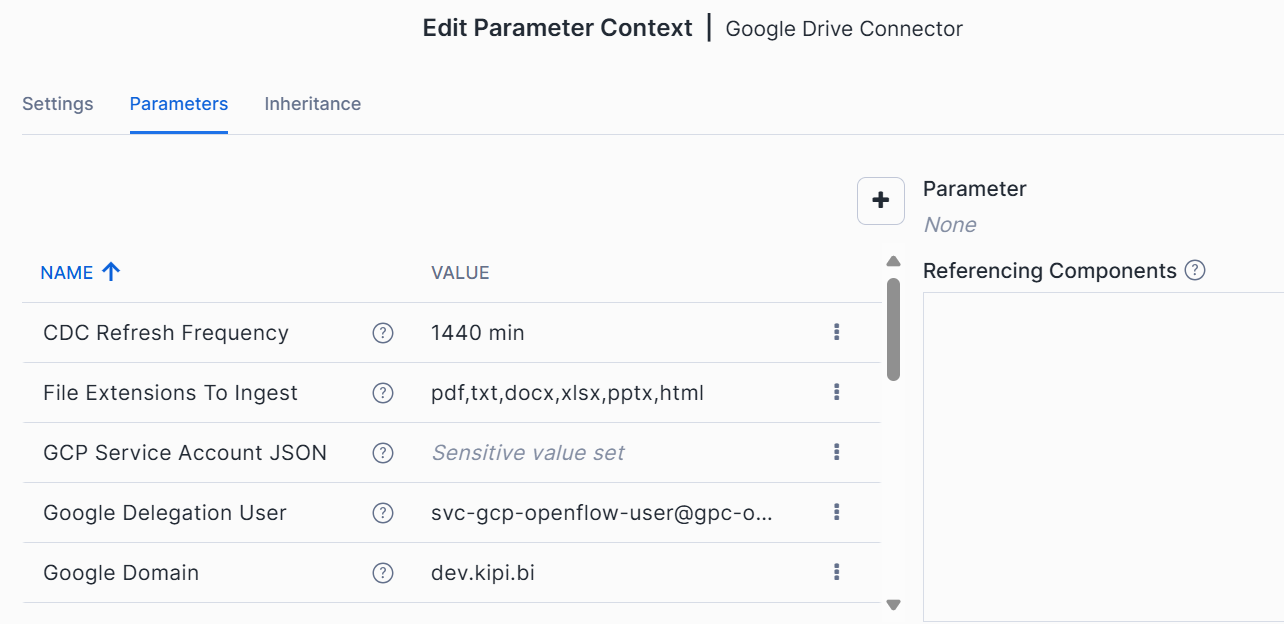
Reference screenshot of the Parameters Context Window
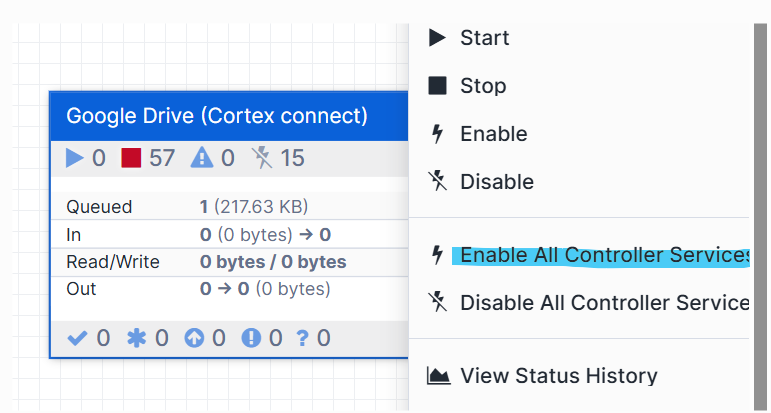
- Enable Controller Services and Start the Flow:
- Right-click on the canvas plane and select Enable all Controller Services.
- Right-click on the imported process group and select Start. The connector will begin ingesting data.
Phase 3: Initializing the Google Drive Connector
Steps:
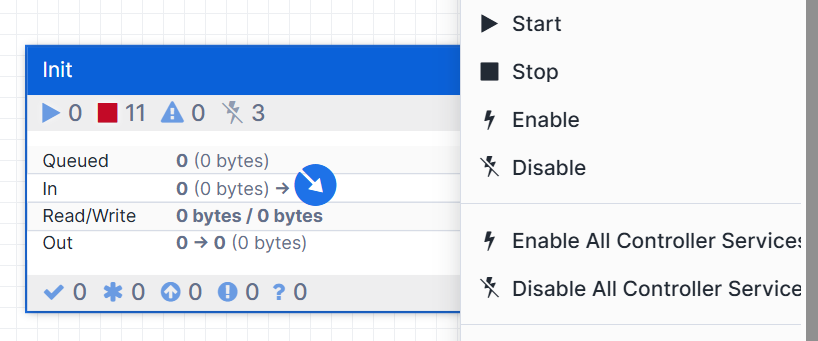
- Double-click on the Google Drive Process Group
→ This will open and take you inside the process group. - Locate the component named Init Process Group
- Right-click on the Init Process Group
- Click Start to initialize it.
- This will create Databases, Schemas, Tables in the Snowflake Account. Please ensure that the Role has sufficient privileges.
Phase 4: Automated Data Ingestion and Cortex Search Service Creation (Behind the Scenes)
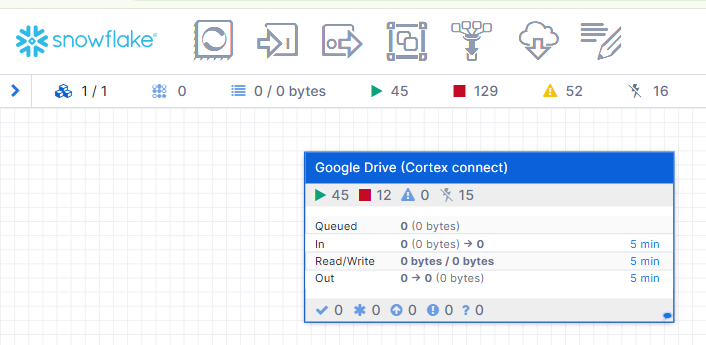
Once started, the Openflow connector for Google Drive (Cortex connect) automates the entire process, including Change Data Capture (CDC).
- CDC (Change Data Capture): The CaptureGoogleDriveChanges processor continuously watches your specified Google Drive for content and updates, including removed, created, and updated events. This ensures your data in Snowflake is always fresh.
- Metadata Processing: The Process Google Drive Metadata group extracts crucial information from each Google Drive file change.
- It fetches metadata, filters files based on their extension and mime type using Map Mime Type to Extension and Filter File by Mime Type processors.
- It checks if the file metadata has changed using RouteOnMetadataChanged.
- Finally, it sets key source attributes such as file ID, name, URL, change type, and user/group permissions.
- Duplicate Content Check: The Check if Duplicate Content group ensures efficiency.
- It uses a CryptographicHashContent processor to generate SHA-256 hashes of file content.
- A SnowflakeDetectDuplicate processor then checks if the content hash already exists in the FILE_HASHES table, preventing re-ingestion of unchanged files. Files with zero size or those explicitly marked to skip chunking are also handled.
- Snowflake Staging and Parsing (Cortex): The Snowflake Stage and Parse PDF group handles the conversion and initial processing of your unstructured data.
- The PutSnowflakeInternalStageFile processor uploads the files to an internal Snowflake stage.
- The PerformSnowflakeCortexOCR processor then utilizes Snowflake Cortex Parse Document with the specified OCR Mode to extract text from the documents, making unstructured data searchable.
- Updating Snowflake Cortex: The Update Snowflake Cortex group manages the storage and indexing of the processed data in Snowflake tables, which are the foundation for the Cortex Search Service.
- It first removes existing chunks and permissions for updated documents (Remove Existing Chunks, Remove Existing Permissions).
- Then, it updates DOCS_PERMS and DOCS_GROUPS tables with current user and group permissions. It also ensures that the PERMS_GROUPS table is properly instantiated.
- The ChunkText processor takes the extracted text and divides it into manageable chunks, optimizing it for search operations. You can configure properties like Chunk Delimiters, Chunk Overlap, Max Chunk Length, and Chunking Strategy.
- Finally, the UpdateChunksTable processor inserts these text chunks along with their metadata into the DOCS_CHUNKS table.
- Cortex Search Service Creation: As part of the initialization flow (managed by the Init process group), a CORTEX SEARCH SERVICE named cortex.search_service is automatically created on the DOCS_CHUNKS table. This service is configured to use user_ids and user_emails as attributes, which is crucial for enforcing access control.
Unlocking Insights: Querying Your Cortex Search Service
Once the connector has ingested and processed your Google Drive content, you can query the Cortex Search Service to unlock powerful insights and build intelligent applications. Snowflake Cortex Search Service can be queried using three methods: Python API, REST API, or the SQL SEARCH_PREVIEW Function.
Crucially, the connector ensures that your search results adhere to the original Google Drive permissions. You can filter responses to restrict them to documents that a specific user has access to.
Querying Options for Cortex Search
- Querying with SQL using SEARCH_PREVIEW
The SEARCH_PREVIEW function is excellent for quick validation and testing directly within a Snowflake worksheet. It allows you to:
- Instantly preview results from your Cortex Search Service.
- Test query phrasing and field relevance.
- Validate the ingestion and indexing of your documents.
Ideal for rapid prototyping before embedding results in dashboards or applications.
SELECT PARSE_JSON(
SNOWFLAKE.CORTEX.SEARCH_PREVIEW(
‘<application_instance_name>.cortex.search_service’,
‘{
“query”: “<your_question>”,
“columns”: [“chunk”, “web_url”, “full_name”, “last_modified_date_time”, “user_ids”, “user_emails”],
“filter”: {“@contains”: {“user_emails”: “<user_emailID>”} },
“limit”: <number_of_results>
}’
)
)[‘results’] AS results;
Replace <application_instance_name> with your database name, <your_question> with your search query, <user_emailID> with the email address of the user for whom you want to filter results, and <number_of_results> (max 1000, default 10).
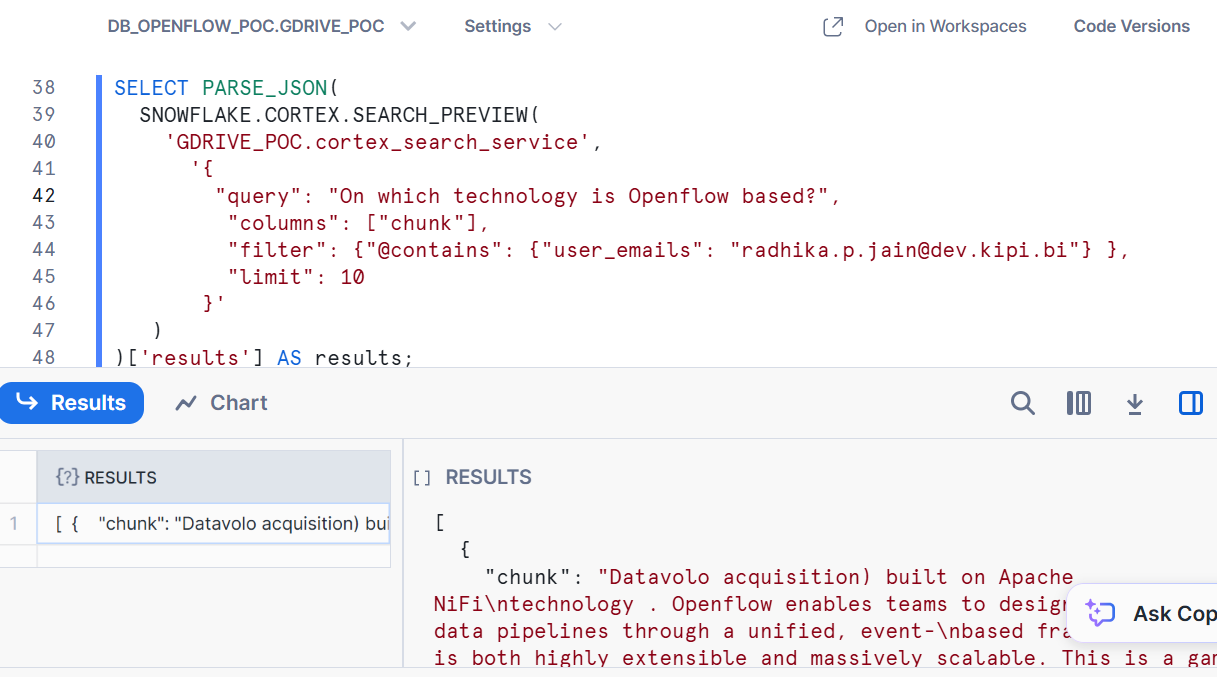
Example:
SELECT PARSE_JSON(
SNOWFLAKE.CORTEX.SEARCH_PREVIEW(
‘GDRIVE_POC.cortex_search_service’,
‘{
“query”: “On which technology is Openflow based?”,
“columns”: [“chunk”],
“filter”: {“@contains”: {“user_emails”: “radhika.p.jain@dev.kipi.bi”} },
“limit”: 10
}’
)
)[‘results’] AS results;
This allows an IT team member to query documents while adhering to Google Drive access controls.
2. Querying with Python API
For programmatic access and building applications, the Python API is ideal.
- Requires: snowflake-cortex-python library version 0.8.0 or later
- Use Case: Embedding search into Python applications, Streamlit dashboards, or backend services.
3. Querying with REST API
The REST API offers direct integration with other systems or services.
Provides: Flexibility and language-agnostic access to search services.
Use Case: CRM systems, chatbots, custom UI layers, third-party tools.
Conclusion
The Snowflake Openflow Connector for Google Drive—paired with Cortex Search Service—delivers a powerful, automated solution for extracting value from unstructured data. By streamlining ingestion, processing, and semantic indexing, it eliminates manual ETL barriers and empowers teams with real-time, permission-aware search.
With this setup, organizations can:
- Simplify onboarding of unstructured data from platforms like Google Drive
- Deliver fast, intelligent answers across business functions
- Maintain security and governance with native access controls
- Enable AI-powered applications such as chatbots, assistants, and dashboards
Ready to transform how your organization leverages Google Drive data?
Discover the power of Openflow and Cortex—turning documents into enterprise intelligence, securely and at scale.
About kipi.ai
Kipi.ai, a WNS company, is a leading analytics and AI services provider, specializing in transforming data into actionable insights through advanced analytics, AI, and machine learning. As an Elite Snowflake Partner, we are committed to helping organizations optimize their data strategies, migrate to the cloud, and unlock the full potential of their data. Our deep expertise in the Snowflake AI Data Cloud enables us to drive seamless data migration, enhanced data governance, and scalable analytics solutions tailored to your business needs. At kipi.ai, we empower clients across industries to accelerate their data-driven transformation and achieve unprecedented business outcomes.
For more information, visit www.kipi.ai and www.wns.com